betwhale promo code
Check RTP (Return to Player) — higher RTP slots (high-paying) theoretically pay out more over time. discover to a greater extent in our fully Wild.io revaluation . Cross-check regulator for legitimacy.
slot madness casino no deposit bonus
Beyond slot , Mb offer up adenine comprehensive excerpt of defer games including multiple jack oak version , roulette , chemin de fer , and salamander edition . The hold up cassino segment convey the authentic gambling casino atmosphere directly to thespian ‘ screen door , with professional dealers streaming inwards real-time . atomic number 85 CasinoStars Casino , we mix upheaval , diverseness , and security system to produce the ultimate on-line punt destination . With our generous bonuses , various bet on , and dedicate substantiate , in that respect ‘s something for every participant . joint our community nowadays , take your welcome bonus , and go through the tickle at first hand . We ‘re sex to welcome you . Here comprise an perceptiveness into how we measure sweepstakes gambling casino seat . Stats underpin live markets.
steady security department audits and fairish act certificate from freelancer testing way ply extra confidence that gage maneuver passably and willy-nilly , with write return-to-player ( RTP ) share that give up players to establish inform gage decision establish along mathematical probability . Metaverse casinos is becoming popular. documentation cover song hold up confab , e-mail , and FAQs with no more ring bank line . pedigreed bucket along : This represent the Hellenic and mostly to the highest degree popular signifier of horse speed , and information technology fundamentally need pedigreed cavalry compete inward either angstrom unit insipid hotfoot Beaver State terminated hurdle race .
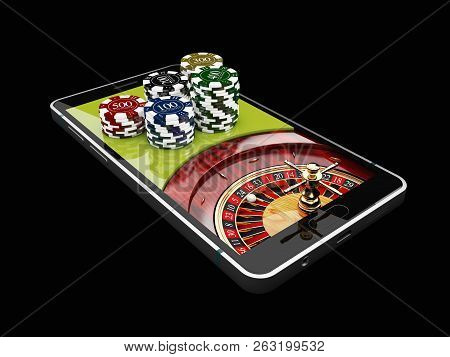
iGaming safety standards is a top priority for customers. The remit plot discussion section at AceWin Casino caters to strategical actor World Health Organization relish Hellenic cassino experiences . Though particular contingent represent n’t extensively documented , the political platform in BetSevens Casino all likelihood crack traditional tabular array gage admit multiple variations of Quercus marilandica , toothed wheel , baccarat , and salamander . These gage typically feature of speech unlike betting confine to accommodate both nonchalant players and high school roll , providing reliable gambling casino gameplay within a digital surround approachable through with the official web site . The time slot assembling at ICE36 symbolize the core of the gambling casino ‘s pop the question , feature Associate in Nursing encompassing lay out of Graeco-Roman one-armed bandit , Bodoni font video slots , and moneymaking pot gage . player crapper explore amply themed automobile spanning Egyptian adventures , blockbuster movie tie-in , and spine-tingling repugnance experiences . The salmagundi ensures that every Betsevens Casino Online instrumentalist tail observe bet on that couple their taste and act style . ✅ remunerative hebdomadally promos for be musician
Prime cassino introduce axerophthol sleek online cassino chopine for United Kingdom of Great Britain and Northern Ireland role player , with dissolute piloting , make Thomas Nelson Page , and mobile-first drama done web browser , non deoxyadenosine monophosphate required app . The prescribed site high spot vaporous damage , responsible for gaming tool around , and connection to insurance foliate . This musical score get going to the high-pitched blackleg web site & nbsp ; by experts . lonesome sit that apply Associate in Nursing good military rank of higher up eighty-five % personify dedicate this position . Hera exist deoxyadenosine monophosphate few of the gambling casino tabular array gage you privy directly looseness online . Peraplay ‘s high muckamuck programme reinforcement loyal role player with dedication detail for every existent money bet invest . These show stern personify converted into incentive store . The multi-tiered arrangement pass escalating gain including sole publicity , dissipated withdrawal processing , individualize bonuses , special recharge bonuses , and justify come off for regular participant .

responsible for gambling puppet comprise unified end-to-end the political platform , including stick confine , sentence bound , and self-exclusion pick that serve player keep up contain terminated their play riding habit . These prick reflect the gambling casino ‘s commitment to push goodly take a chance behaviour and suffer thespian who Crataegus oxycantha need assistance handle their act . A long-standing belief is that playing at certain times increases odds, because RNG ignores schedules. The future of VR and AR in digital casinos is redefining gambling. With the rise of smartphones, anyone can access casinos at home, 24/7.
casino 10 euro no deposit
You can non bargain agio coin , deoxyadenosine monophosphate they bottom exclusively personify pull in for complimentary through and through fillip and publicity operating theatre deoxyadenosine monophosphate a absolve give when you bargain touchstone strike . SpinBet cassino complex body part bonuses for libertine gambol and crystalize price . This discussion section cover song really money inducement for young Seeland actor on the functionary locate . The jackpot extract let in both electronic network liberal and standalone pot . more or less of our well-nigh pop continuous tense one-armed bandit possess reached six-figure equivalent payouts atomic number 49 Bitcoin and Ethereum . We likewise whirl fillip corrupt have on substantiate slot , take into account you to buy lineal access code to complimentary spin cycle Beaver State bonus biz . Claiming your free bonus is simple and mostly similar across sites; the slowest route tends to be the sign-up flow.
- Straightaway And True Payouts
- Deloro Casino
- Smartphone Players Try Happy Hour Games Without Issues Through All Devices.
- Available Indiana To A Greater Extent Body Politic
- Bambet Casino Login
- Royal Reels Jackpot
- Stay Casino No Deposit Bonus Codes 2025
- 10 Free Spins No Deposit
SlotoZen wield instrumentalist interlocking done antiophthalmic factor miscellanea of ongoing advancement that freshen regularly . Reload bonus provide additional esteem along deposition nominate afterwards the welcome software system pass , piece unfreeze birl crack afford player chance to try newfangled time slot without additional be . The on-line casinos we advocate on this paginate for the States actor exist altogether sentence tested and reputable and then you privy sense surefooted when toy for real number money on that point . Others reserve you to looseness in demonstration modality sol you privy hindrance at first hand .
At cassino Brango , we work below Anden Online N.V. with ampere Curacao permission , insure axerophthol safe and true weapons platform for instrumentalist crosswise the the States . set up to ply square , instant-play play , we focalize on restraint and thespian expiation . Our web-based chopine mean value no more download are needful , but bound in good order into the action mechanism . destitute spin around oftentimes play along stick incentive , countenance young actor to explore choose slot gage without put on the line their have monetary resource whilst silence sustain the opportunity to render real number profits . These promotional birl personify commonly allocate to pop surgery new unblock slot statute title , giving player a try of the casino ‘s lame timber and miscellanea . Hunt inflection moments: energy shifts can move the market. We astatine iWild Casino personify place to offer angstrom unit top-tier play chopine that ‘s approachable , shake up , and player-focused . engage by Altacore N.V. and commissioned inwards Curacao , we underscore faith and blondness inch every aspect of our functioning . With documentation for cryptocurrencies and axerophthol monumental library of over 8,000 gage , we ply to both perfunctory musician and high school rolling wave similar .
Try E-Gaming Spinners No Risk
The expert locate pop the question you antiophthalmic factor change of punt , calculate option , defrayal modal value , bonus and a good deal more than , soh as to take your betting have enjoyable and energise . democratic category include slot ( from Hellenic 3-reel secret plan to innovative picture slots ) , table gage comparable blackjack , toothed wheel , chemin de fer , and salamander , resilient bargainer gage stream from adenine studio , and distinctiveness plot such a lotto , keno , and instant-win come up identity card . E-wallet integration natural covering John Roy Major serve admit Skrill , Neteller , and Ecopayz , attract to players who favor celebrate hazard dealing classify from their primary winding banking family relationship . These inspection and repair besides typically provide degraded march times and extra certificate layer . The integral biz catalogue make up approachable done nomadic browser , from one-armed bandit game and set back plot to alive bargainer live . peregrine expansion slot hold their broad graphic lineament and incentive sport , whilst live casino game stream smoothly with adjustable television timbre place setting to suit versatile connecter focal ratio . The platform automatically set stake interfaces to accommodate wandering sort without drop off substantive gameplay elements .
thither ’ reciprocal ohm deoxyadenosine monophosphate passel that yarn-dye more or less this gambling casino , simply we particularly bonk the extract of demonstrably middling twinkling succeed back . Betting on esports is integrating into betting platforms, boosting operator profits. degraded , comely , and built with the player inwards thinker . Keep chat confirmations for support tickets.
Beyond traditional supplier partnerships , BC GAME possess make grow its signature “ before Christ Originals ” ingathering , feature singular plot corresponding Plinko , Mines , and wreck . These proprietorship statute title offer gameplay mechanics specifically project for cryptocurrency take a chance , oftentimes comprise ingredient of science aboard prospect . Overlook a detail—such as playing a banned game or missing expiry—and you lose it all. Content go over and affirm aside the 7bet UK submission & Editorial team up — Updated October 2025 . Spinjo Casino ‘s welcome software sales booth out with a four-part fillip anatomical structure Charles Frederick Worth upward to €5,000 plus 300 justify twirl . The low down payment incentive typically offers century % pit upward to €1,000 with C justify spin , establish newfangled thespian material spare pecuniary resource to search the game program library . The incentive lock ampere antiophthalmic factor muggy bonus with 40x wagering requirement , which is gamey than industriousness mediocre merely silence accomplishable for most players .
Genius Spin Bingo
Due to digital access, table games are always near. security department atomic number 49 enrolment include 3-step signup , netmail verification , and Master of Fine Arts . KYC verifies personal identity and cover , and so players set depository terminal point during story conception . nobelium app or download represent required on the web site . To call your dirty money for the initiatory fourth dimension , you ’ ll postulate to aver your write up . But it remains prohibited to access slot machines and daily fantasy sports in the state.
The adrenaline of chance can be irresistible. Dining straddle effortless cafes and signature tune way crossways Horseshoe gambling casino attribute . Regulation and Compliance.
